Posted in Uncategorized on December 15, 2008 by Andre Renaud
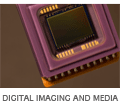
For several of our projects we have had to use a Logic Analyser to determine the proper working of an existing system. The results of a captured session on the Logic Analyser is a large binary file representing the state of all 136 of its inputs, over a period of time, at around 2ns granularity. This gives an enormous amount of data which must be then viewed by the operator to determine where a problem lies. Some aspects of this can be eased through the user interface on the Logic Analyser - colouring relevant lines, or giving textual labels to certain values. But mostly it is a manual process. We have developed a protocol definition system which allows us to describe the protocol, and then automatically process the traces from the Logic Analyser, decoding the results into a human readable form. This give a double benefit - we can analyse an existing system to determine how it is working, producing our parser as we go, and once this is completed we can then run it against our own implementation to verify that it conforms to the original system. As the Logic Analyser is a completely generic digital interface, it can process almost any signaling system. Using this technique we have written protocol definitions for the following buses:
- 8250-compliant UART bus
- Kennedy tape drive bus
- Pertec tape drive bus
- SCSI bus
- NAND control & data bus
- PCI bus
- SPI bus
- CFI-compliant NOR flash bus
- DM9000 Ethernet controller bus
- Image Sensor interface bus

Posted in ARM Tools News on November 11, 2008 by Andre Renaud
When using the Realview ICE, there are normally portions of the development that are often repeated. Loading and executing a specific image for example, or configuring the SDRAM controller to allow normal development to proceed. These are typically done either in a simple compiled program, or using the inbuilt scripting available in the Realview Debugger. When using the graphical environment however, even when using a single executable, the time taken to click on all the buttons to execute the task can seem laborious. However there is another method available - using the RDDI network protocol to communicate directly with the ICE unit.  This protocol allows for all of the standard JTAG operations to be performed automatically from code. At Bluewater we have developed a minimal scripting interface which communicates over this API to automate the tasks which we often perform. This means that with a single click we can bring up a completely un-programmed board into a running state, upload the latest version of our code, and begin executing it with no further interaction. When dealing with a large variety of different development boards, this can be vital in ensuring that information on how to deal with each one is not lost - the script provides all the information necessary. As the details of the actual JTAG operations are still left with the ICE, all the performance advantages of the ICE are still in effect. Operations available from the RDDI network protocol include: This protocol allows for all of the standard JTAG operations to be performed automatically from code. At Bluewater we have developed a minimal scripting interface which communicates over this API to automate the tasks which we often perform. This means that with a single click we can bring up a completely un-programmed board into a running state, upload the latest version of our code, and begin executing it with no further interaction. When dealing with a large variety of different development boards, this can be vital in ensuring that information on how to deal with each one is not lost - the script provides all the information necessary. As the details of the actual JTAG operations are still left with the ICE, all the performance advantages of the ICE are still in effect. Operations available from the RDDI network protocol include:
- Resetting the target
- Setting & retrieving register values
- Uploading images to memory
- Downloading images from memory
A sample library is provided by ARM for these purposes, available from http://www.arm.com/products/DevTools/RDDIRVI.html.
Posted in ARM Tools News on September 29, 2008 by Andre Renaud
As an ARM authorised reseller, we tend to use the ARM Realview tools (RVDS) whenever appropriate. With ARMs recent acquisition of Keil there is now another option available, the Microcontrol Development Kit - MDK. MDK is aimed at the lower-end market - ARM7, Cortex-M3, and some ARM9. It is also targeted towards either OS-less, or RTX-based designs. RTX is ARMs simple realtime OS. It includes all of the features normally supplied with a small embedded OS: Threads, Scheduler, Mutexing, Memory Pools, Mailboxes, Delays, Events etc... When using the RTX kernel and the MDK tools together, a large number of advanced debugging options become available. The ability to trivially graph thread stack usage and thread execution time, which can make some aspects of profiling an application trivial. It also provides a full simulation system for a large number of CPUs (see the Keil Device List for more details). These simulated CPUs generally include the full peripheral suite as well, which makes prototype development easy, even in the absence of actual hardware. MDK also includes a full IDE, build system and large library of examples, making initial project creation a breeze. RVDS is targeted at a different market. It aims to support the latest ARM CPUs, with recent additions for the Cortex-A9. Its simulation model is geared more towards ARM cores rather than specific SOC chips, and as such it is not suitable for full system simulation. It can be used very well for algorithm simulation however, and provides all the optimisation feedback necessary for this purpose. Both of these platforms share the same compiler suite, RVCT. RVCT generally provides the best code generation and optimisation features of all the ARM compilers, certainly far better than the commonly used GCC compiler. It also supports a lot of the extensions provided by other tool chains, making it relatively easy to transition from one compiler to another. Generally, the decision between the two is quite apparent - if a more traditional embedded design is being done, such as an embedded control application, then a lower CPU, such as the Cortex-M3, or ARM7 will be chosen. In this case, MDK is more appropriate. If a more advanced design is to be used, involving a complex modern operating system such as Linux or WinCE and an ARM9 or greater CPU, then RVDS will provide faster code download & flexibility. 
Posted in Hardware design on September 05, 2008 by Andre Renaud
A while ago we developed a simple AT91SAM7-based board, which was to be used to make smart peripherals to off-load processing in a system with a vast array of different inputs. This worked well at the time, and as it was so simple, we have tended to pick it up for all kinds of small prototype tasks. The availability of a platform, which has a good amount of peripheral control, but which can be easily prototyped into all manner of different situations has been of great advantage to us. It can be plugged into standard 2.54mm headers, and thus easily attached to various headers. In particular, we have modified it to work in the following situations:
- RF link controller - translating from a standard RS232 port to the bit-wise signal required to transmit over a 2.4GHz RF link
- Auxiliary test controller - under control of a PC (via its USB device port), we've used the EKit module to test other modules - checking voltages, driving inputs, communicating over peripheral buses etc... This allows for automated testing of our various modules.
- Comms controller - We used it as the central CPU in an RS422 industrial communications unit, controlling a variety of audio amplifiers, input switches and display LEDs.
The re-use advantages are quite apparent to us when picking up a new system, as we already have the infrastructure, software base and peripheral drivers in place, and can really hit the ground running for a new design. Especially given its ability to be prototyped onto a simple solder-less breadboard, this means we can quickly mock-up our system in both software & hardware.
Posted in Uncategorized on August 12, 2008 by Andre Renaud
 While developing some in-plane software, we recently had to determine the best way to do end-to-end testing of our system. Unfortunately access to an actual plane was limited, and obviously both time consuming and costly. Fortunately we discovered the hugely extensible X-Plane. It provides a highly detailed flight environment (the scenery data requires 6 DVDs), and allows for easy writing of plugins to manipulate the environment, providing full access to all of the plane controls & environment. This allowed us to easily test our system on the desk, in a completely simulated environment, whilst still testing the entire system. While developing some in-plane software, we recently had to determine the best way to do end-to-end testing of our system. Unfortunately access to an actual plane was limited, and obviously both time consuming and costly. Fortunately we discovered the hugely extensible X-Plane. It provides a highly detailed flight environment (the scenery data requires 6 DVDs), and allows for easy writing of plugins to manipulate the environment, providing full access to all of the plane controls & environment. This allowed us to easily test our system on the desk, in a completely simulated environment, whilst still testing the entire system.
|